Stonewell project gallery
Roofing work. Explore tear-off, decking, underlayment and shingle installation across roofing projects. Select any photo to see the details.
Explore the details
From tear-off Photos and footage supplied by Stonewell’s owner. Project sequences and additional roofing details are grouped below.
All photos Roof removal Decking & underlayment Installation Roof overviews
32 photos
Project photography
Dormer roof replacement Follow the work from exposed roof framing through new decking, underlayment and the installed shingle roof.
View photo ↗ Roof tear-off around dormers Front view during roof tear-off, with framing and insulation exposed around two dormers.
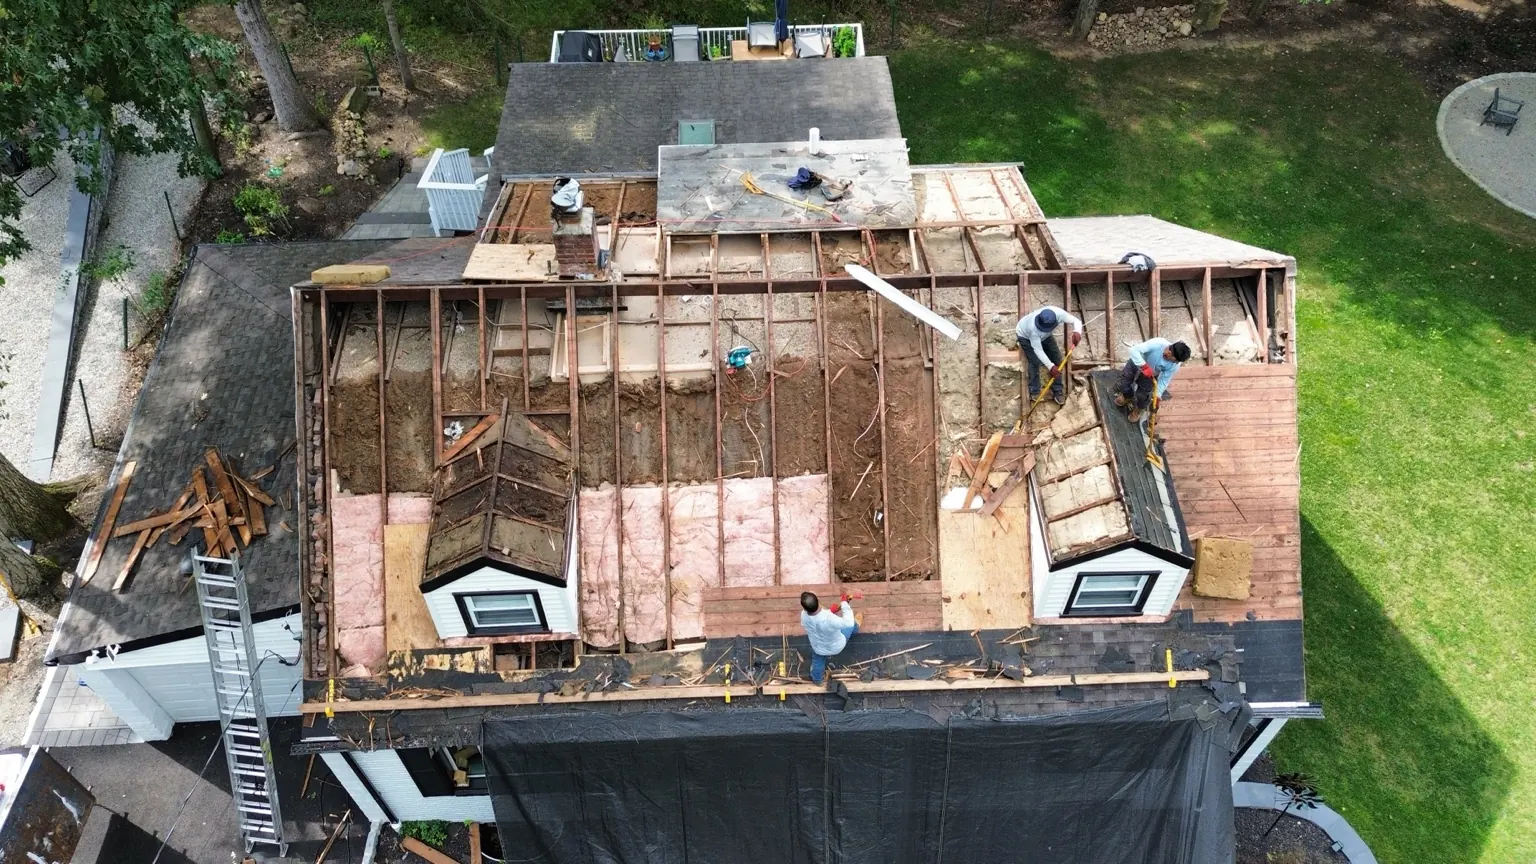
View photo ↗ Exposed roof framing Overhead view of the exposed roof framing during removal of the old roof deck.
View photo ↗ Deck removal in progress Wide aerial view of the crew removing roof decking around the dormers.
View photo ↗ New decking and underlayment Aerial view of new roof decking and synthetic underlayment around the dormers and adjoining roof sections.
View photo ↗ Shingles and low-slope roof work Shingle installation and adjoining low-slope roof work in progress, with tools and materials still on site.
View photo ↗ Installed shingles around dormers Front view of the new gray shingle roof around two dormers, with finishing work still in progress.
View photo ↗ Shingle roof detail Closer angled view of the new shingle courses and dormer roof details during finishing work.
View photo ↗ Roof after installation Aerial overview of the installed shingle roof, dormers and adjoining black low-slope roof section.
Project photography
Roof replacement around skylights Roof tear-off, deck preparation, underlayment and shingle installation around multiple skylights.
View photo ↗ Roof deck preparation Front view of roof deck preparation above the house, with the garage roof still covered in old shingles.
View photo ↗ Tear-off around skylights Overhead view of shingle removal around the skylights, exposing the roof deck.
View photo ↗ Underlayment around skylights Synthetic underlayment and staged shingle bundles around the skylights before the main shingle field is installed.
View photo ↗ Roof ready for shingles Overhead view of underlayment, skylights and staged roofing materials.
View photo ↗ Shingle installation from above New shingles across the main roof and garage, with materials and finishing work still visible.
Project photography
House and garage roofing Roof removal, installation details and aerial views of the house and attached garage.
View photo ↗ Roof removal Existing shingles being removed, exposing the roof deck.
View photo ↗ Shingle installation Overhead view of shingle installation with tools and materials on the roof.
View photo ↗ Roof details in progress Installation around hips, ridges and roof penetrations.
View photo ↗ Rear roof installation Rear roof view during shingle installation.
View photo ↗ Ridge and shingle detail Close view of shingle courses and ridge details.
View photo ↗ House and garage roof Front view of the shingle roof over the house and garage.
View photo ↗ Rear roof slopes Rear roof slopes, chimney and roof penetrations.
View photo ↗ Aerial roof overview Aerial view of the main roof and attached garage.
View photo ↗ Roof planes from above Overhead view of roof planes, ridge lines and penetrations.
Project photography
Completed architectural shingle roof Three views of the same finished roof show its shingle fields, intersecting roof planes and ridge details.
View photo ↗ Completed roof from above Angled aerial view of the finished architectural shingle roof and adjoining roof sections.
View photo ↗ Roof planes and ridge lines Overhead view of the finished shingle fields, roof planes, ridges and visible roof penetrations.
View photo ↗ Finished ridge details Closer view of architectural shingles, ridge caps, ridge vents and roof penetrations.
Project photography
Tear-off and deck preparation Follow the visible preparation sequence from removed roofing material to exposed decking, eave work and a prepared roof surface.
View photo ↗ Tear-off stage Removed roofing material and debris across the roof during shingle tear-off.
View photo ↗ Exposed deck and eave Exposed roof decking and an open lower eave during roof replacement preparation.
View photo ↗ Prepared roof deck Roof deck after tear-off, with new wood along the lower edge before underlayment installation.
Project photography
More roofing project details Separate project views show new decking, shingle installation, pipe flashing and roof-to-skylight transitions.
View photo ↗ New decking from above Aerial view of new wood decking, skylights and underlayment in progress on another roof replacement.
View photo ↗ Shingle installation in progress Shingles advancing across the roof with synthetic underlayment and staged roofing materials still visible.
View photo ↗ Pipe flashing detail Close view of a metal and rubber pipe boot and the surrounding architectural shingles.
View photo ↗ Roof around multiple skylights Shingle roof surface and visible metal transitions around a group of skylights.
Plan your project
Tell us what Share your full property address, the affected roof section and your preferred appointment window. Add photos taken from a safe location to help explain the concern.
Talk with Stonewell
Get a roofing A few quick questions so we know what your roof needs before we call.
Request received. Your roofing details have been saved for Stonewell to review.
An appointment is confirmed only after Stonewell contacts you.
Close photo ×
← Previous photo Next photo →

 View photo ↗
 View photo ↗
 View photo ↗
 View photo ↗
 View photo ↗
 View photo ↗
 View photo ↗
 View photo ↗


